
First Time Setup
After installation, Certum Draft guides you through initial setup. Here’s what each step involves.
Terms of Use
Section titled “Terms of Use”The first screen shows the Terms of Use. These cover:
- The software is provided as-is for testing purposes
- You’re responsible for verifying all generated documents
- Your data stays on your computer (no cloud storage)
Click Accept & Continue to proceed.
Licence Activation
Section titled “Licence Activation”You’ll need a licence — or your firm’s Setup Pack — to use Certum Draft.
Setting up a second Mac? Use the Setup Pack
Section titled “Setting up a second Mac? Use the Setup Pack”If Certum Draft is already set up in your firm, the fastest way in is the firm’s Setup Pack — one encrypted file that activates your licence and applies the firm’s settings (folders, Notion connection, the Tasks database and the Office page) in a single step. Ask whoever administers Certum Draft to export one for you.
- Click Import Setup Pack…
- Choose the
.certumsetupfile — it’s usually kept in the firm’s shared Dropbox folder - Enter the passphrase that came with the pack (it travels separately from the file)
That’s it — the licence, folder locations, and Notion connection are all applied at once.
Entering a licence key by hand
Section titled “Entering a licence key by hand”If you don’t have a Setup Pack, enter your licence manually below the or enter a license key divider:
- Paste your licence key (it looks like
CERTUM-XXXX-XXXX-XXXX) - Optionally add your email address and name (your name is used for the home-page greeting)
- Click Activate
Once activated, you’ll see a confirmation screen. Click Continue to proceed.
Document Engine Setup
Section titled “Document Engine Setup”Certum Draft uses a document engine to generate your Word and Excel files. The engine — including its own Python runtime — is signed and bundled inside the app, so there’s nothing to install separately and no system Python is needed or used. This step just checks the bundled engine and gets it ready.
What’s happening:
- Checking the bundled document engine
- Configuring the template engine
This usually takes a few seconds. When complete, click Continue.
Quick Setup
Section titled “Quick Setup”The final step configures where Certum Draft stores your files.
Matters Folder
Section titled “Matters Folder”This is where all your client matter folders will be created.
Recommended: Use your firm’s existing matters folder, such as:
- A shared network drive
- A Dropbox or iCloud folder
- A local folder on your Mac
Click Choose Folder to select the location.
Templates Folder
Section titled “Templates Folder”This is where Certum Draft looks for document templates.
Your administrator will set up templates here. Each template type (Estates, Conveyancing, etc.) has its own subfolder.
Matter Numbering
Section titled “Matter Numbering”Choose how matter numbers are generated:
| Format | Example | Best For |
|---|---|---|
| Sequential | 000001, 000002, 000003 | Simple numbering |
| Year-Sequential | 2026-0001, 2026-0002 | Reset each year |
| Custom Prefix | ABC-000001 | Firm-specific codes |
The next number comes from the matters already in the folder, so a new Mac joining a firm never restarts the sequence or lowers the firm’s shared counter — onboarding writes a number only if it is above every matter it can see.
Folder Naming
Section titled “Folder Naming”Choose how matter folders are named:
Default format: {matterNumber} - {surname} {givenName} - {matter.name}
Example: 000107 - SCHRUTE Dwight - Estate of Mose Schrute
All Done!
Section titled “All Done!”Click Get Started to complete setup and open Certum Draft.
Adjusting Settings Later
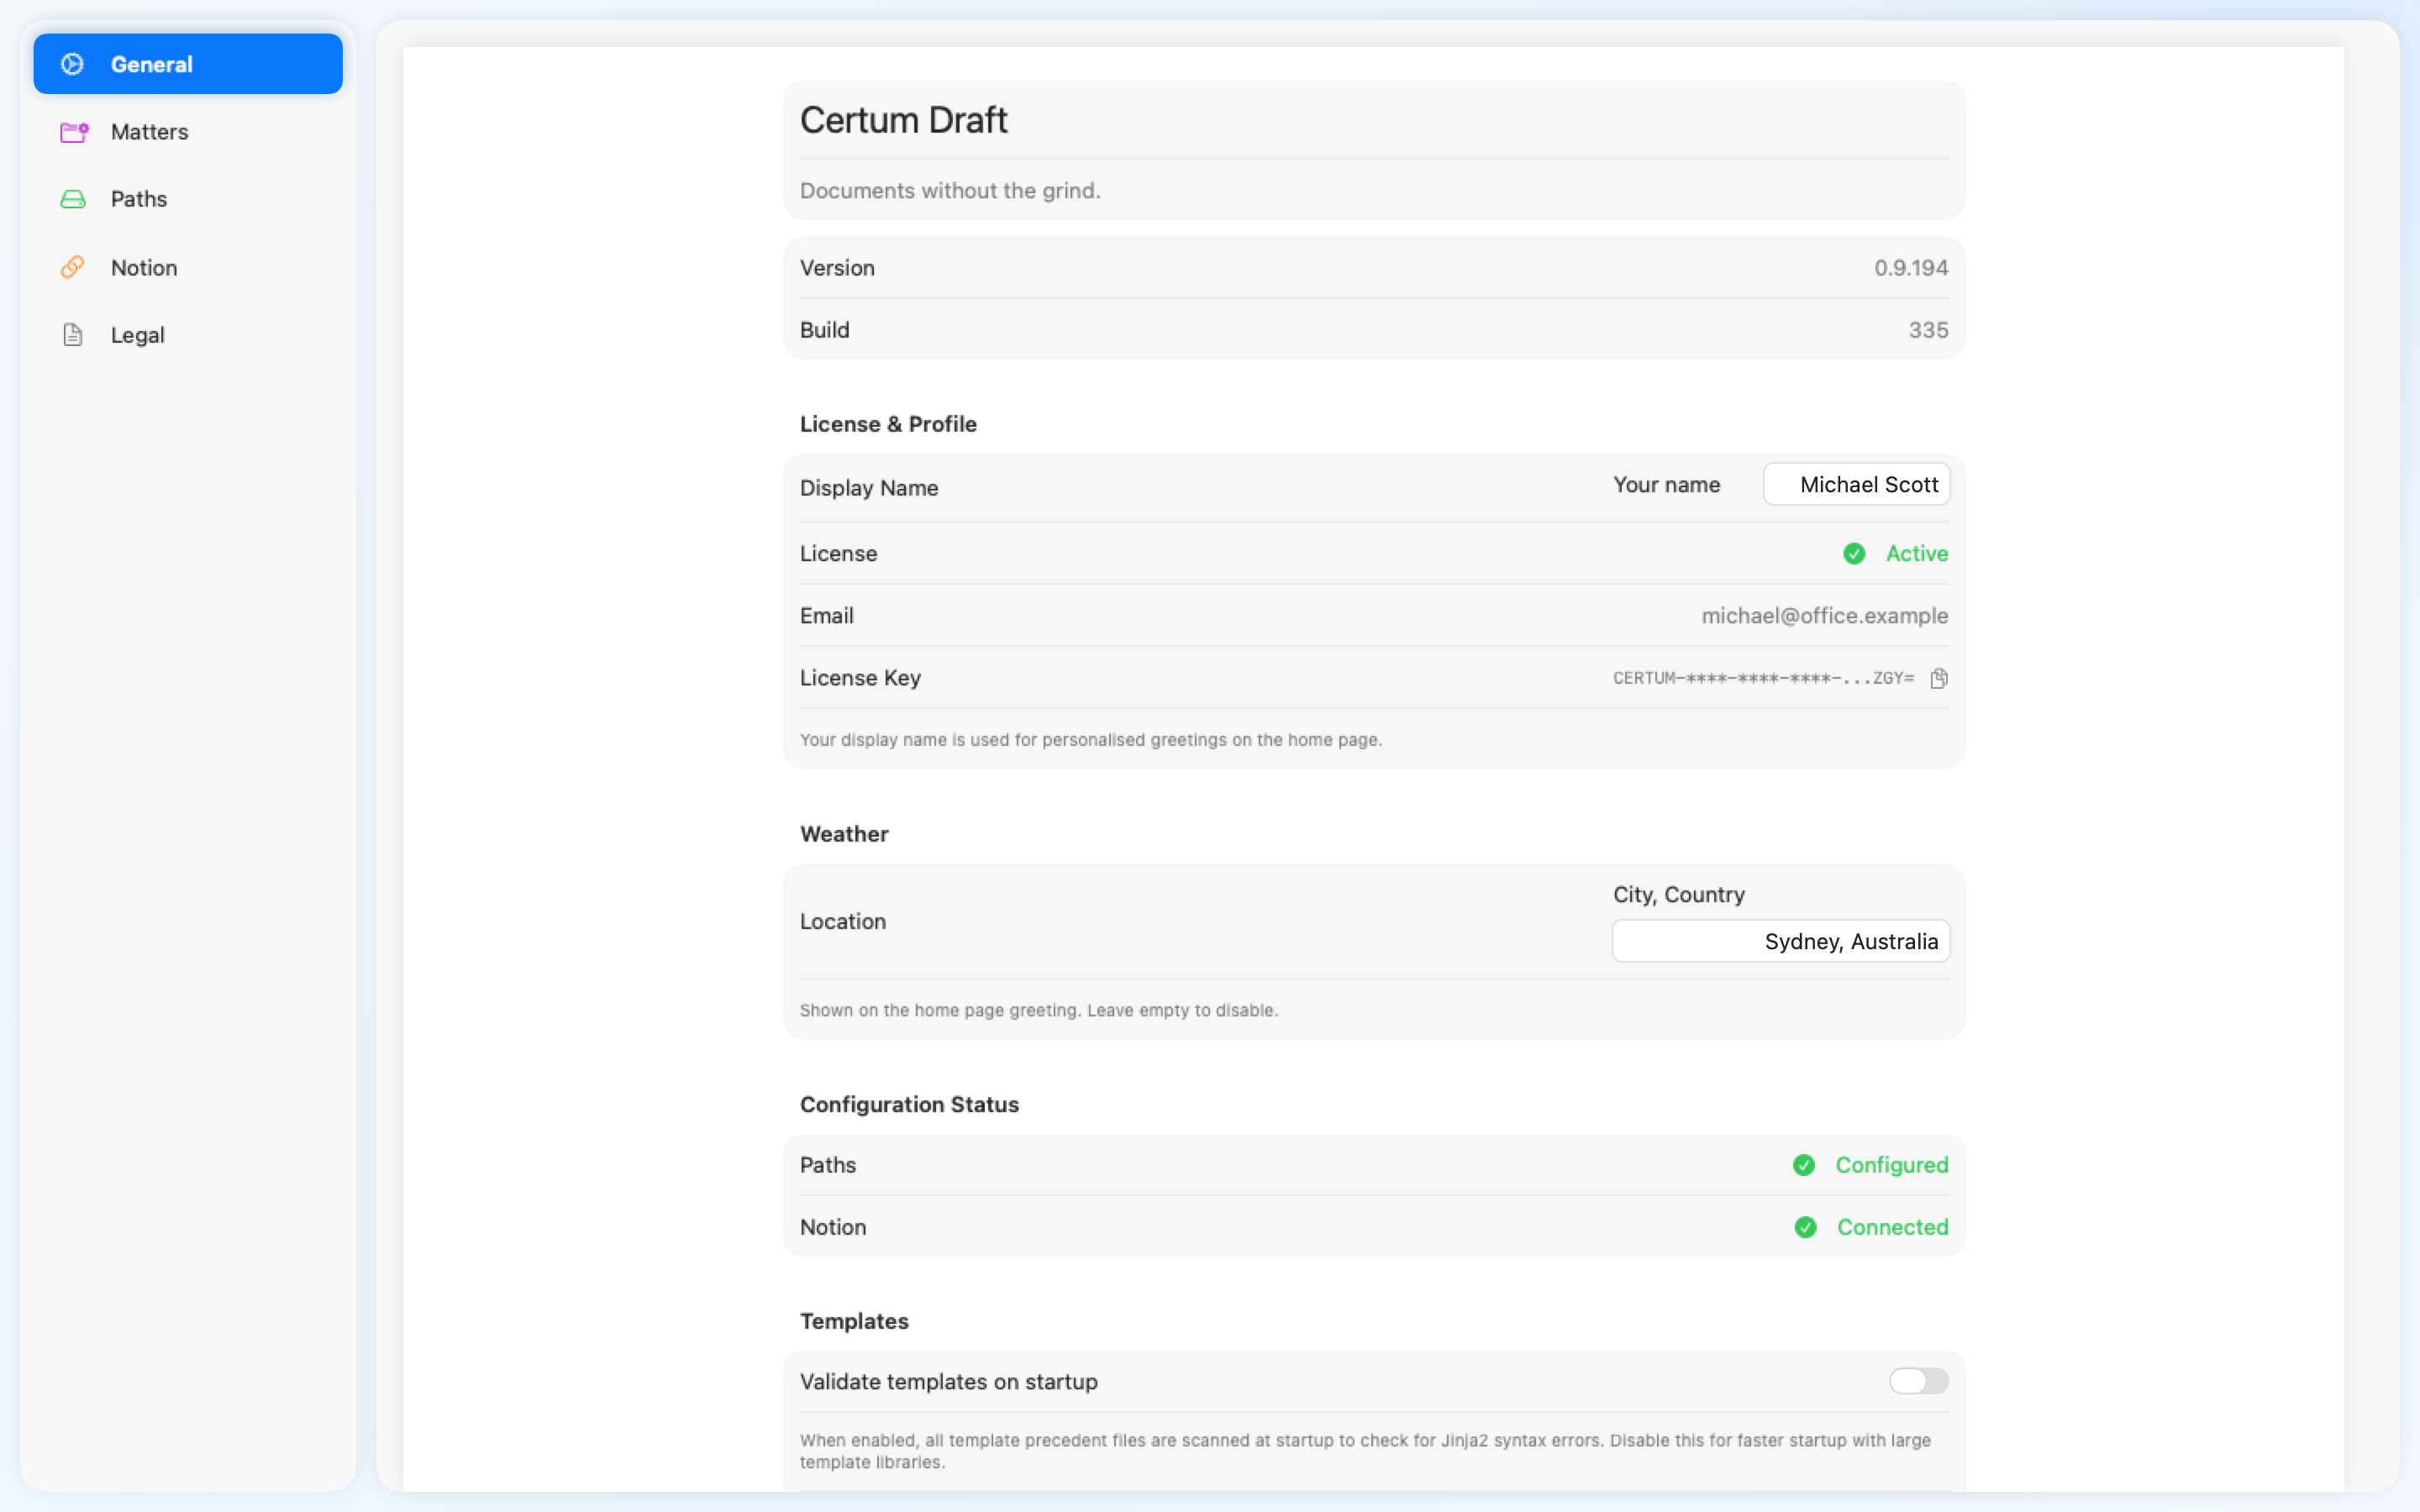
Section titled “Adjusting Settings Later”Every option from Quick Setup can be changed later from Settings (⌘ + ,), a sidebar of ten panes. The General pane shows your licence, weather location, and configuration status; Paths holds the folders and Matters the numbering, and the Settings reference covers the rest.
Optional: Connect Notion
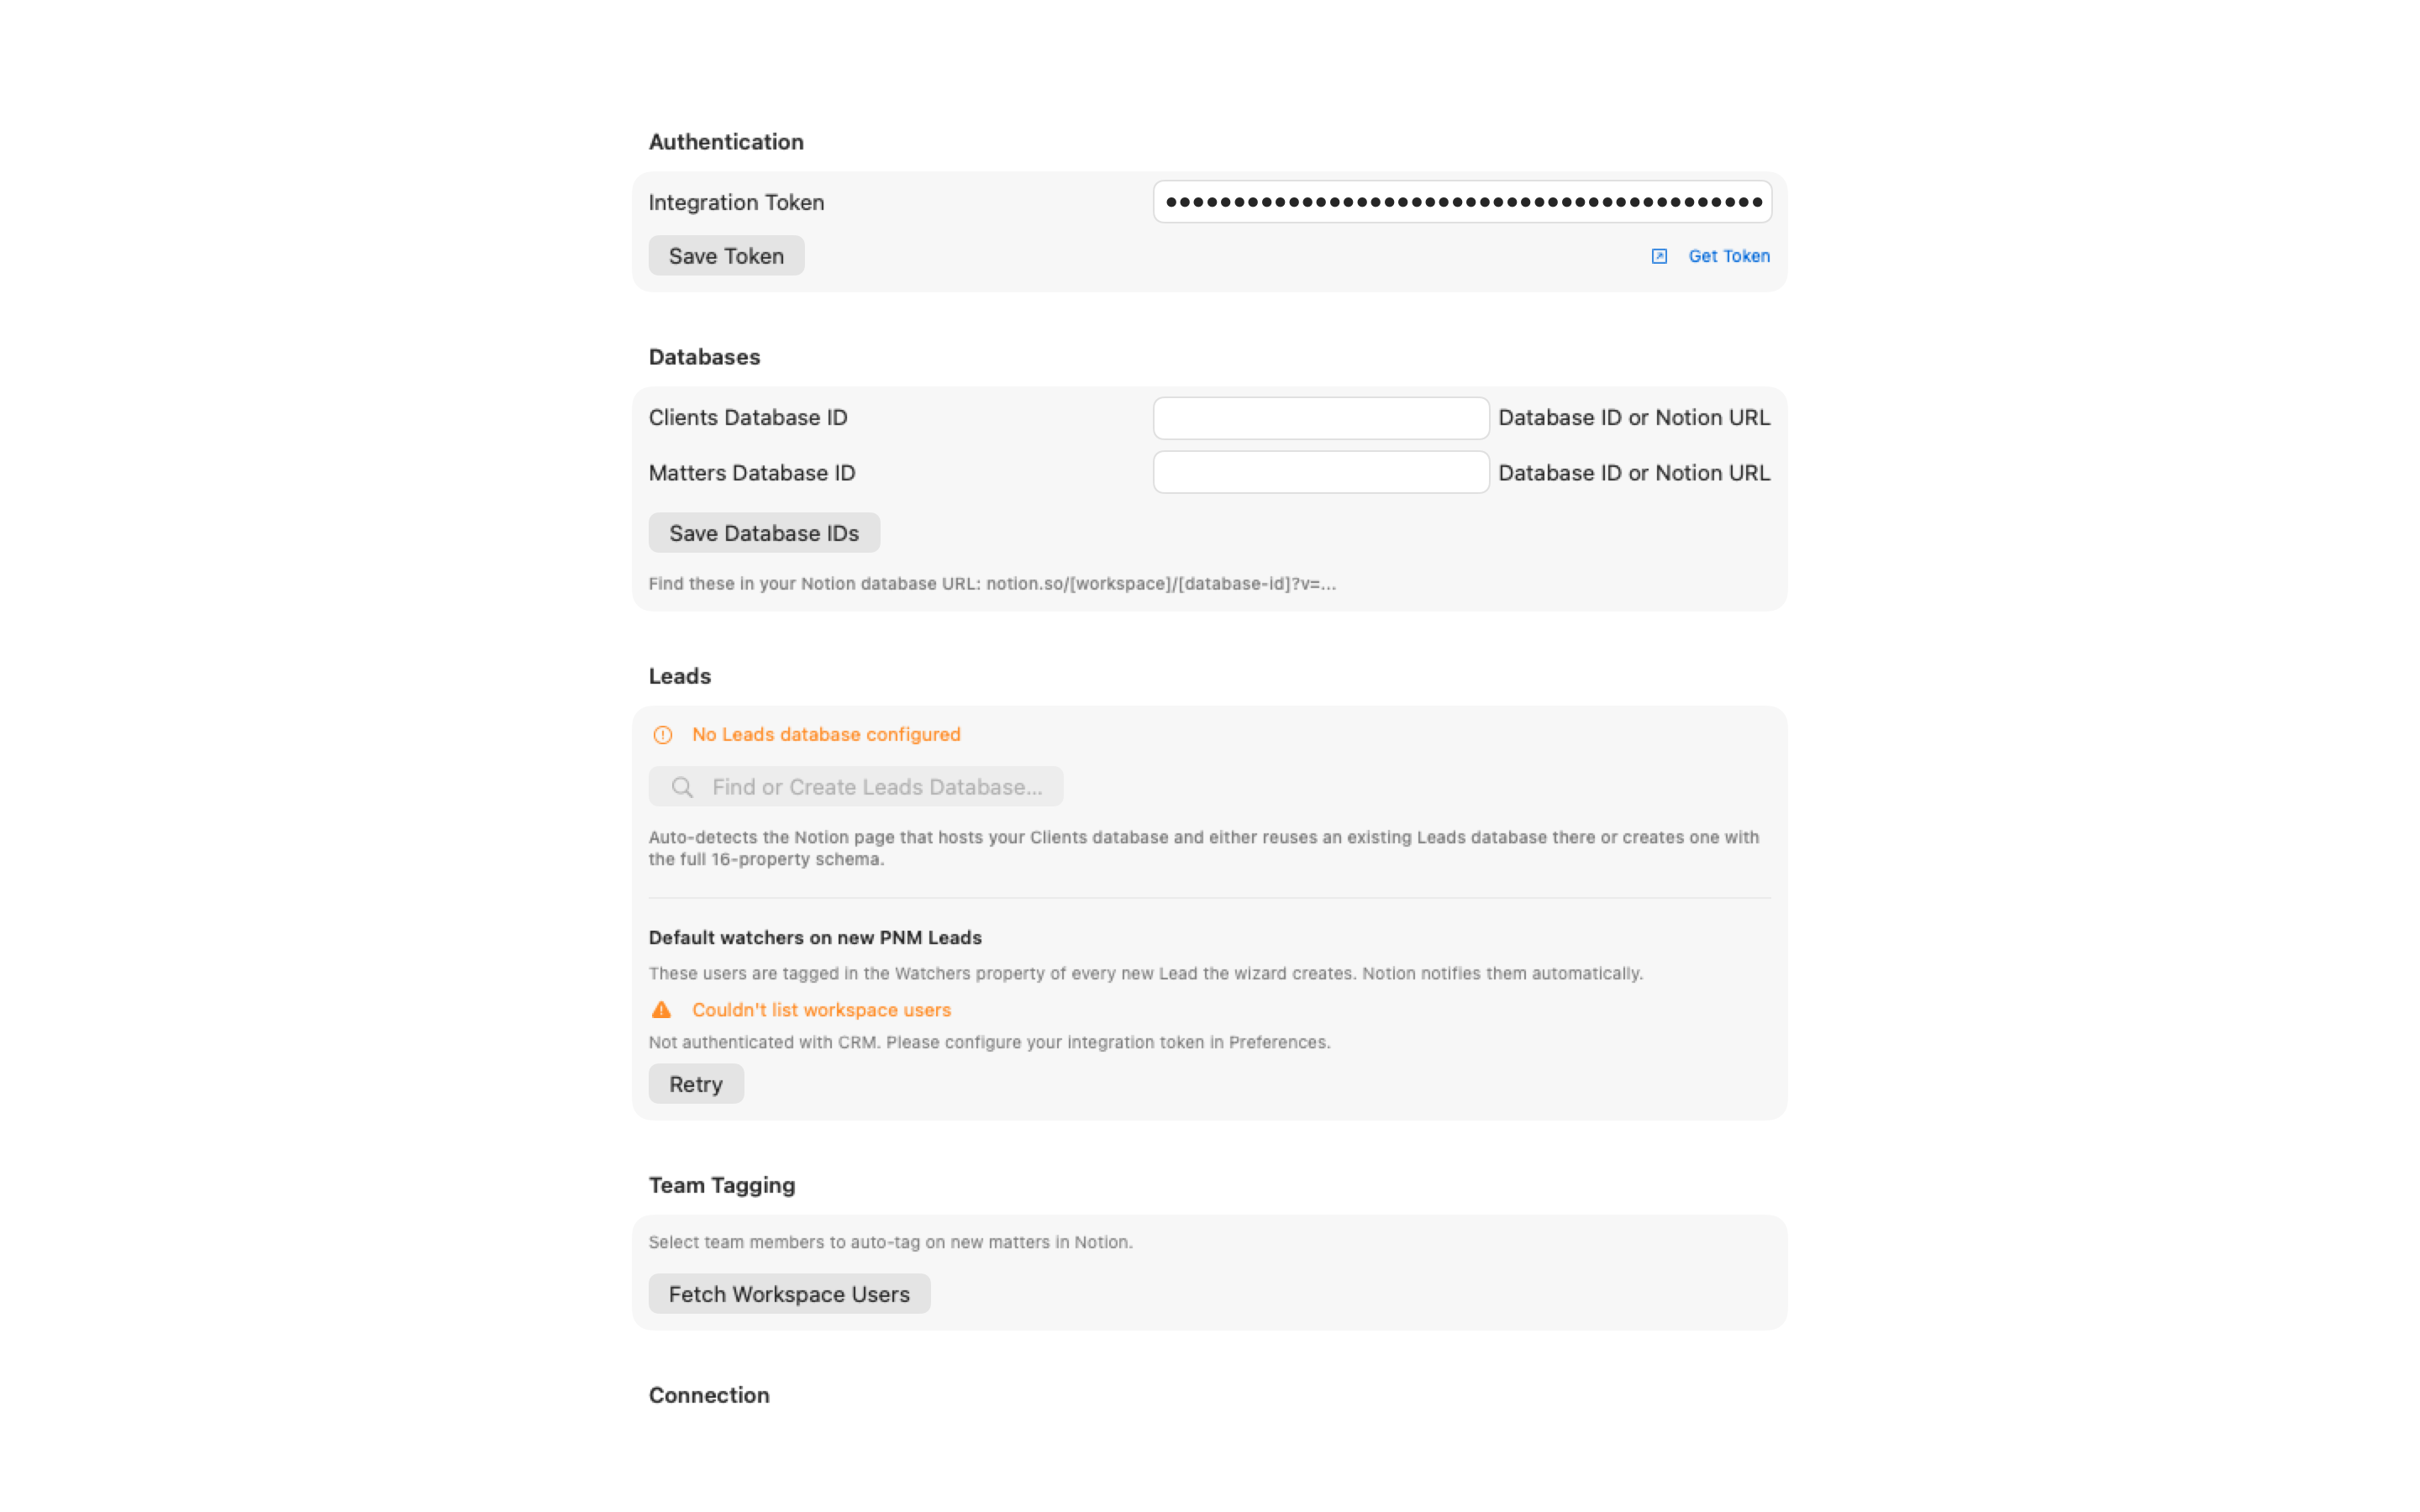
Section titled “Optional: Connect Notion”If your firm uses Notion as its client and matter register, you can connect it from Settings → Notion. This is optional — Certum Draft works without it — but connecting adds shared notes, team status, tasks and the Leads workflow (tracking enquiries before they become matters).
- In Notion, create an internal integration and copy the integration token
- In Certum Draft, open Settings → Notion and paste the token, then click Save Token
- Paste your Clients database URL (or ID) and your Matters database URL (or ID) — they save as you type
- Click Find or Create Leads Database… — Certum Draft locates an existing Leads database in the same Notion workspace, or offers to create one with the full schema if none exists
- Optionally pick Default watchers — these workspace members are automatically tagged on every new lead so Notion can notify them
- For tasks, paste the Tasks database URL (or ID) and choose who you are under I am — see Tasks
You’re now ready to: