Matter Workspace
The Matter Workspace is your central hub for managing an open matter. View key information at a glance, edit client details, generate documents, and track progress through workflow stages.
Opening a Matter
Section titled “Opening a Matter”There are several ways to open a matter in the workspace:
- From Recent Matters: Click a matter in the Recent Matters list on the dashboard
- From the Matters list: The sidebar’s Matters destination (⌘2) lists every matter — Return opens the selected one
- From the command palette: Press ⌘ + K and type a number, client or address (⌘Return opens in a new window)
- From Finder: Double-click a
.certumfile in the matter folder - Via URL: Use a
certum://open?matter=000108link (e.g., from Notion) - After Creation: Click “Open Matter” on the matter creation completion screen
The Workspace Layout
Section titled “The Workspace Layout”The Matter Workspace sidebar lists the sections available for the matter — always Overview, Details, Documents and Invoices, plus Settlement (for conveyancing) and Institutions and Estate (for deceased estates) when the template enables them:
Overview
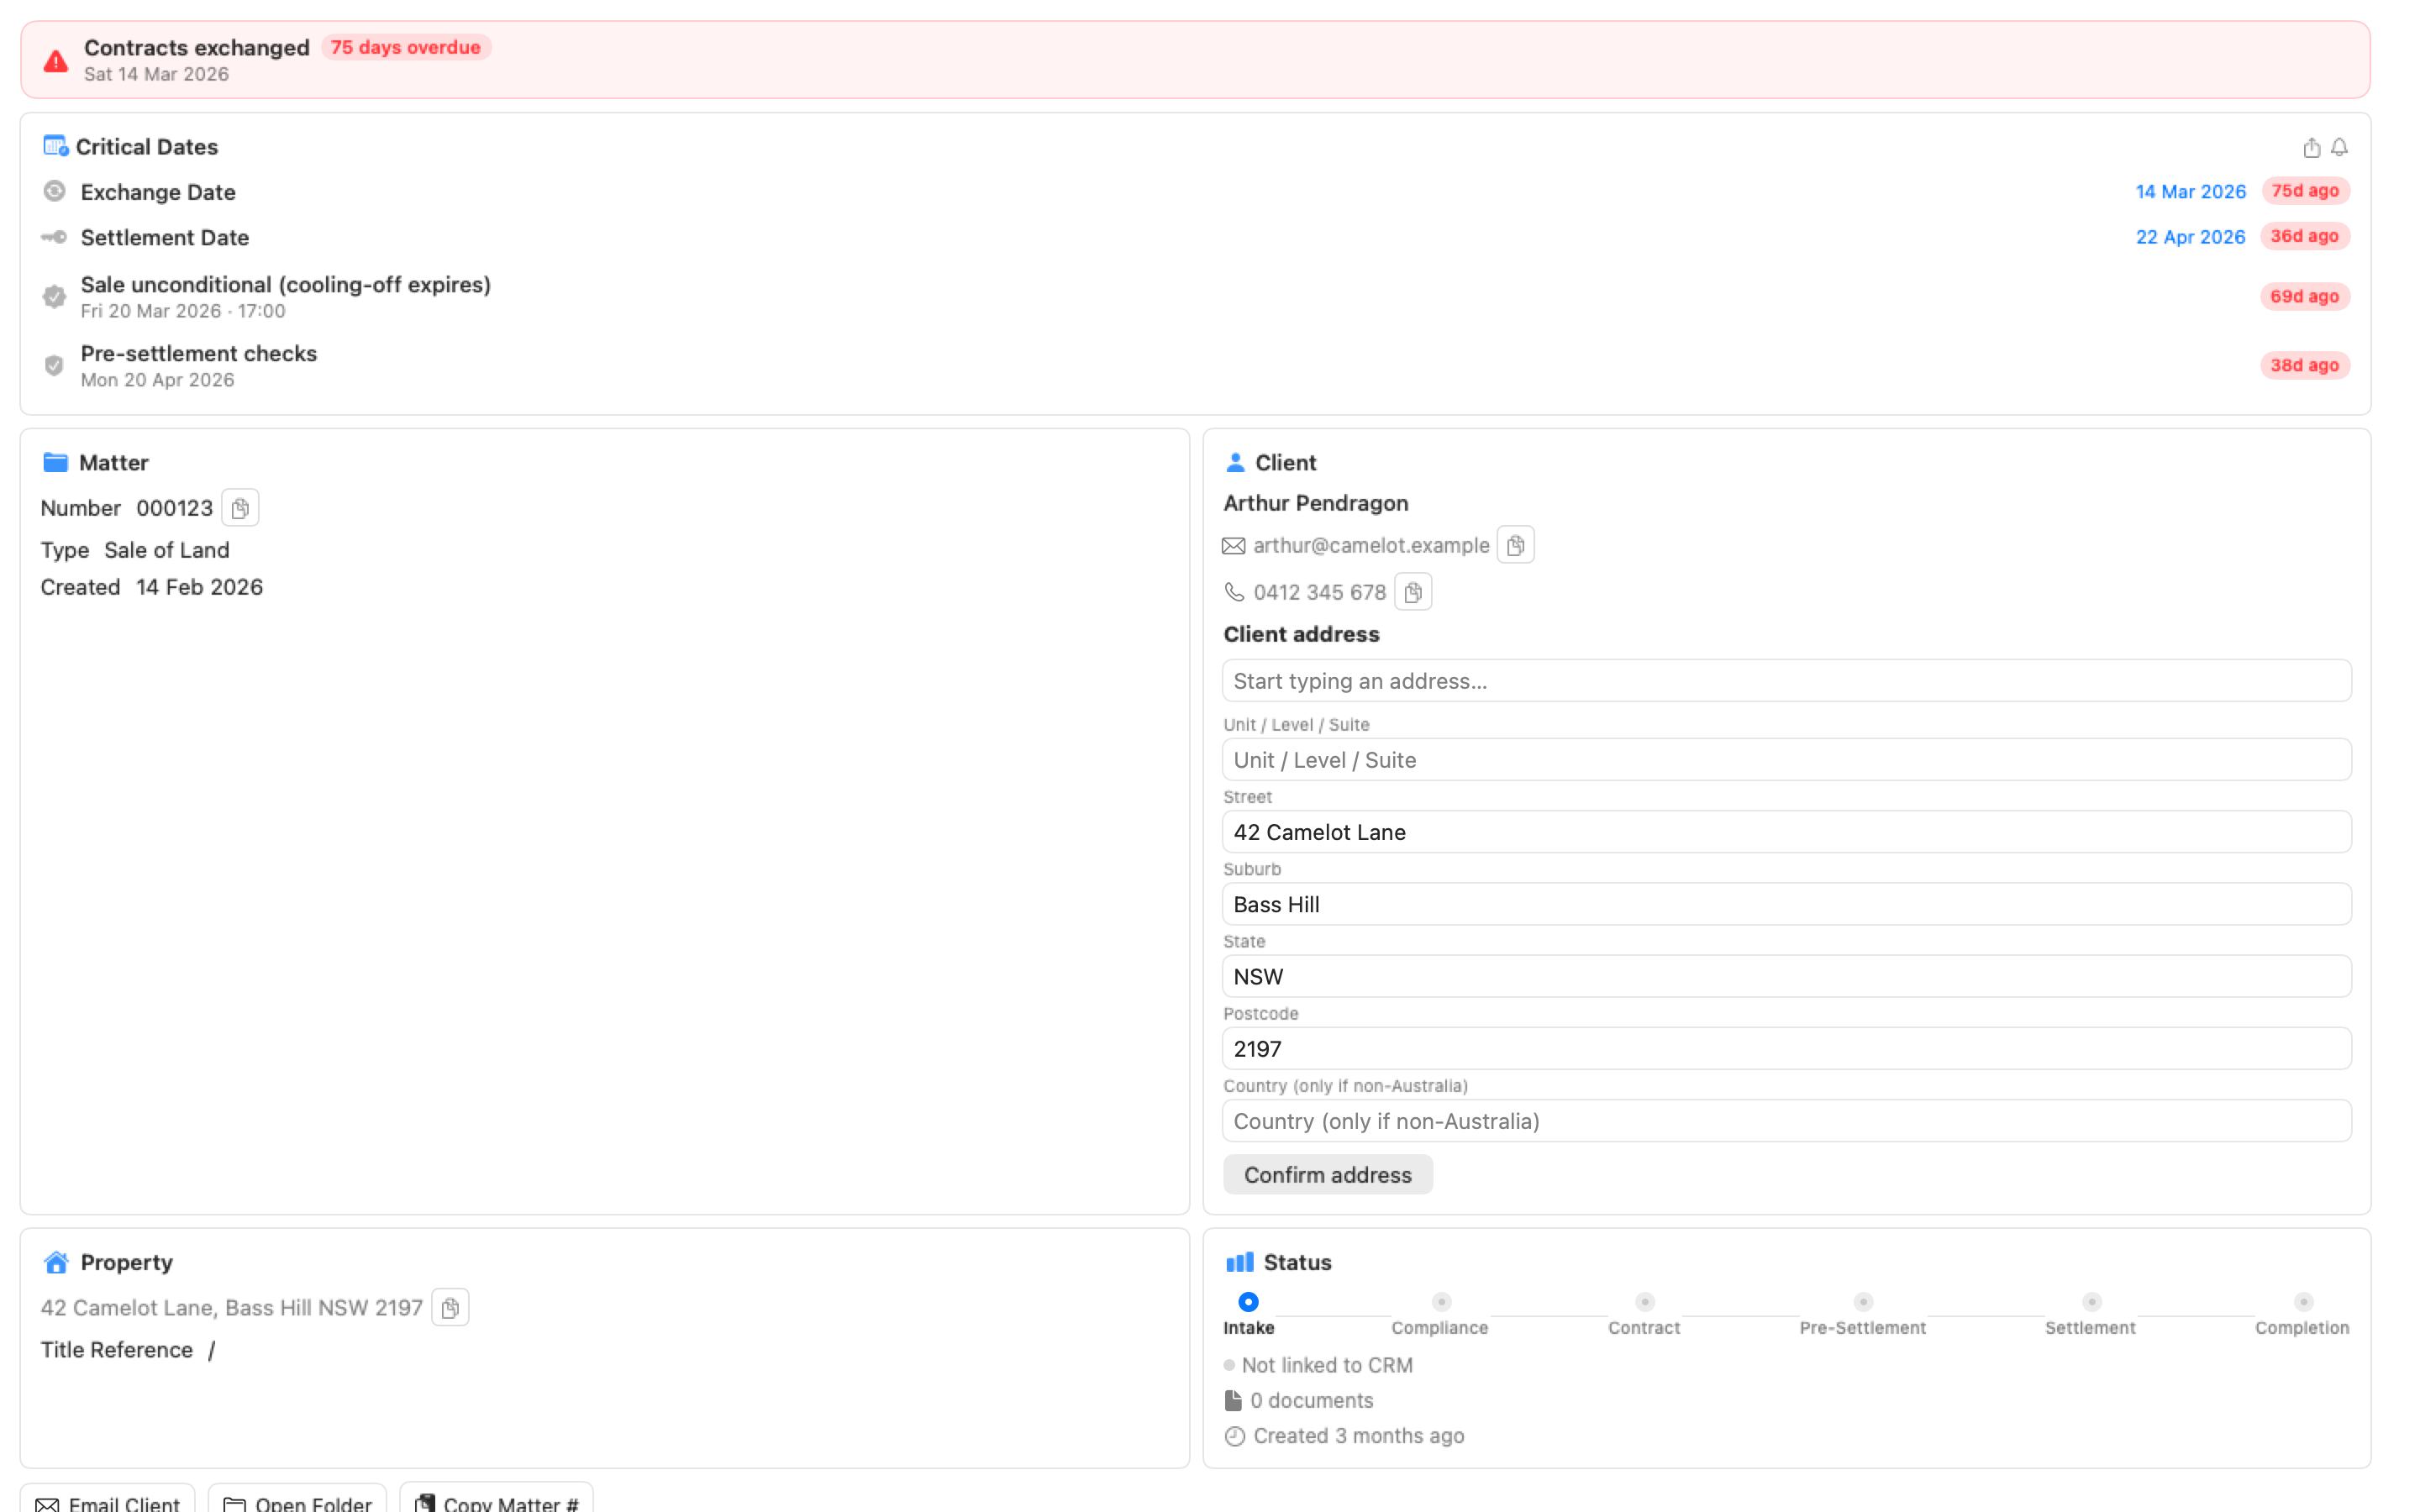
Section titled “Overview”The default view showing key information at a glance:
- Matter Card — Matter number, type, and description with copy button
- Client Card — Client name, address, and contact details
- Property Card — Property address (for conveyancing matters)
- Workflow Timeline — Visual progress through matter stages
- Pin — The pin button in the toolbar keeps the matter in your PINNED list on the dashboard for one-click access
Verified Addresses
Section titled “Verified Addresses”Client and property cards on the Overview let you verify an address at the point of use. When a client’s address has not been verified yet, the card switches the read-only address line for an inline editor with a MapKit autocomplete:
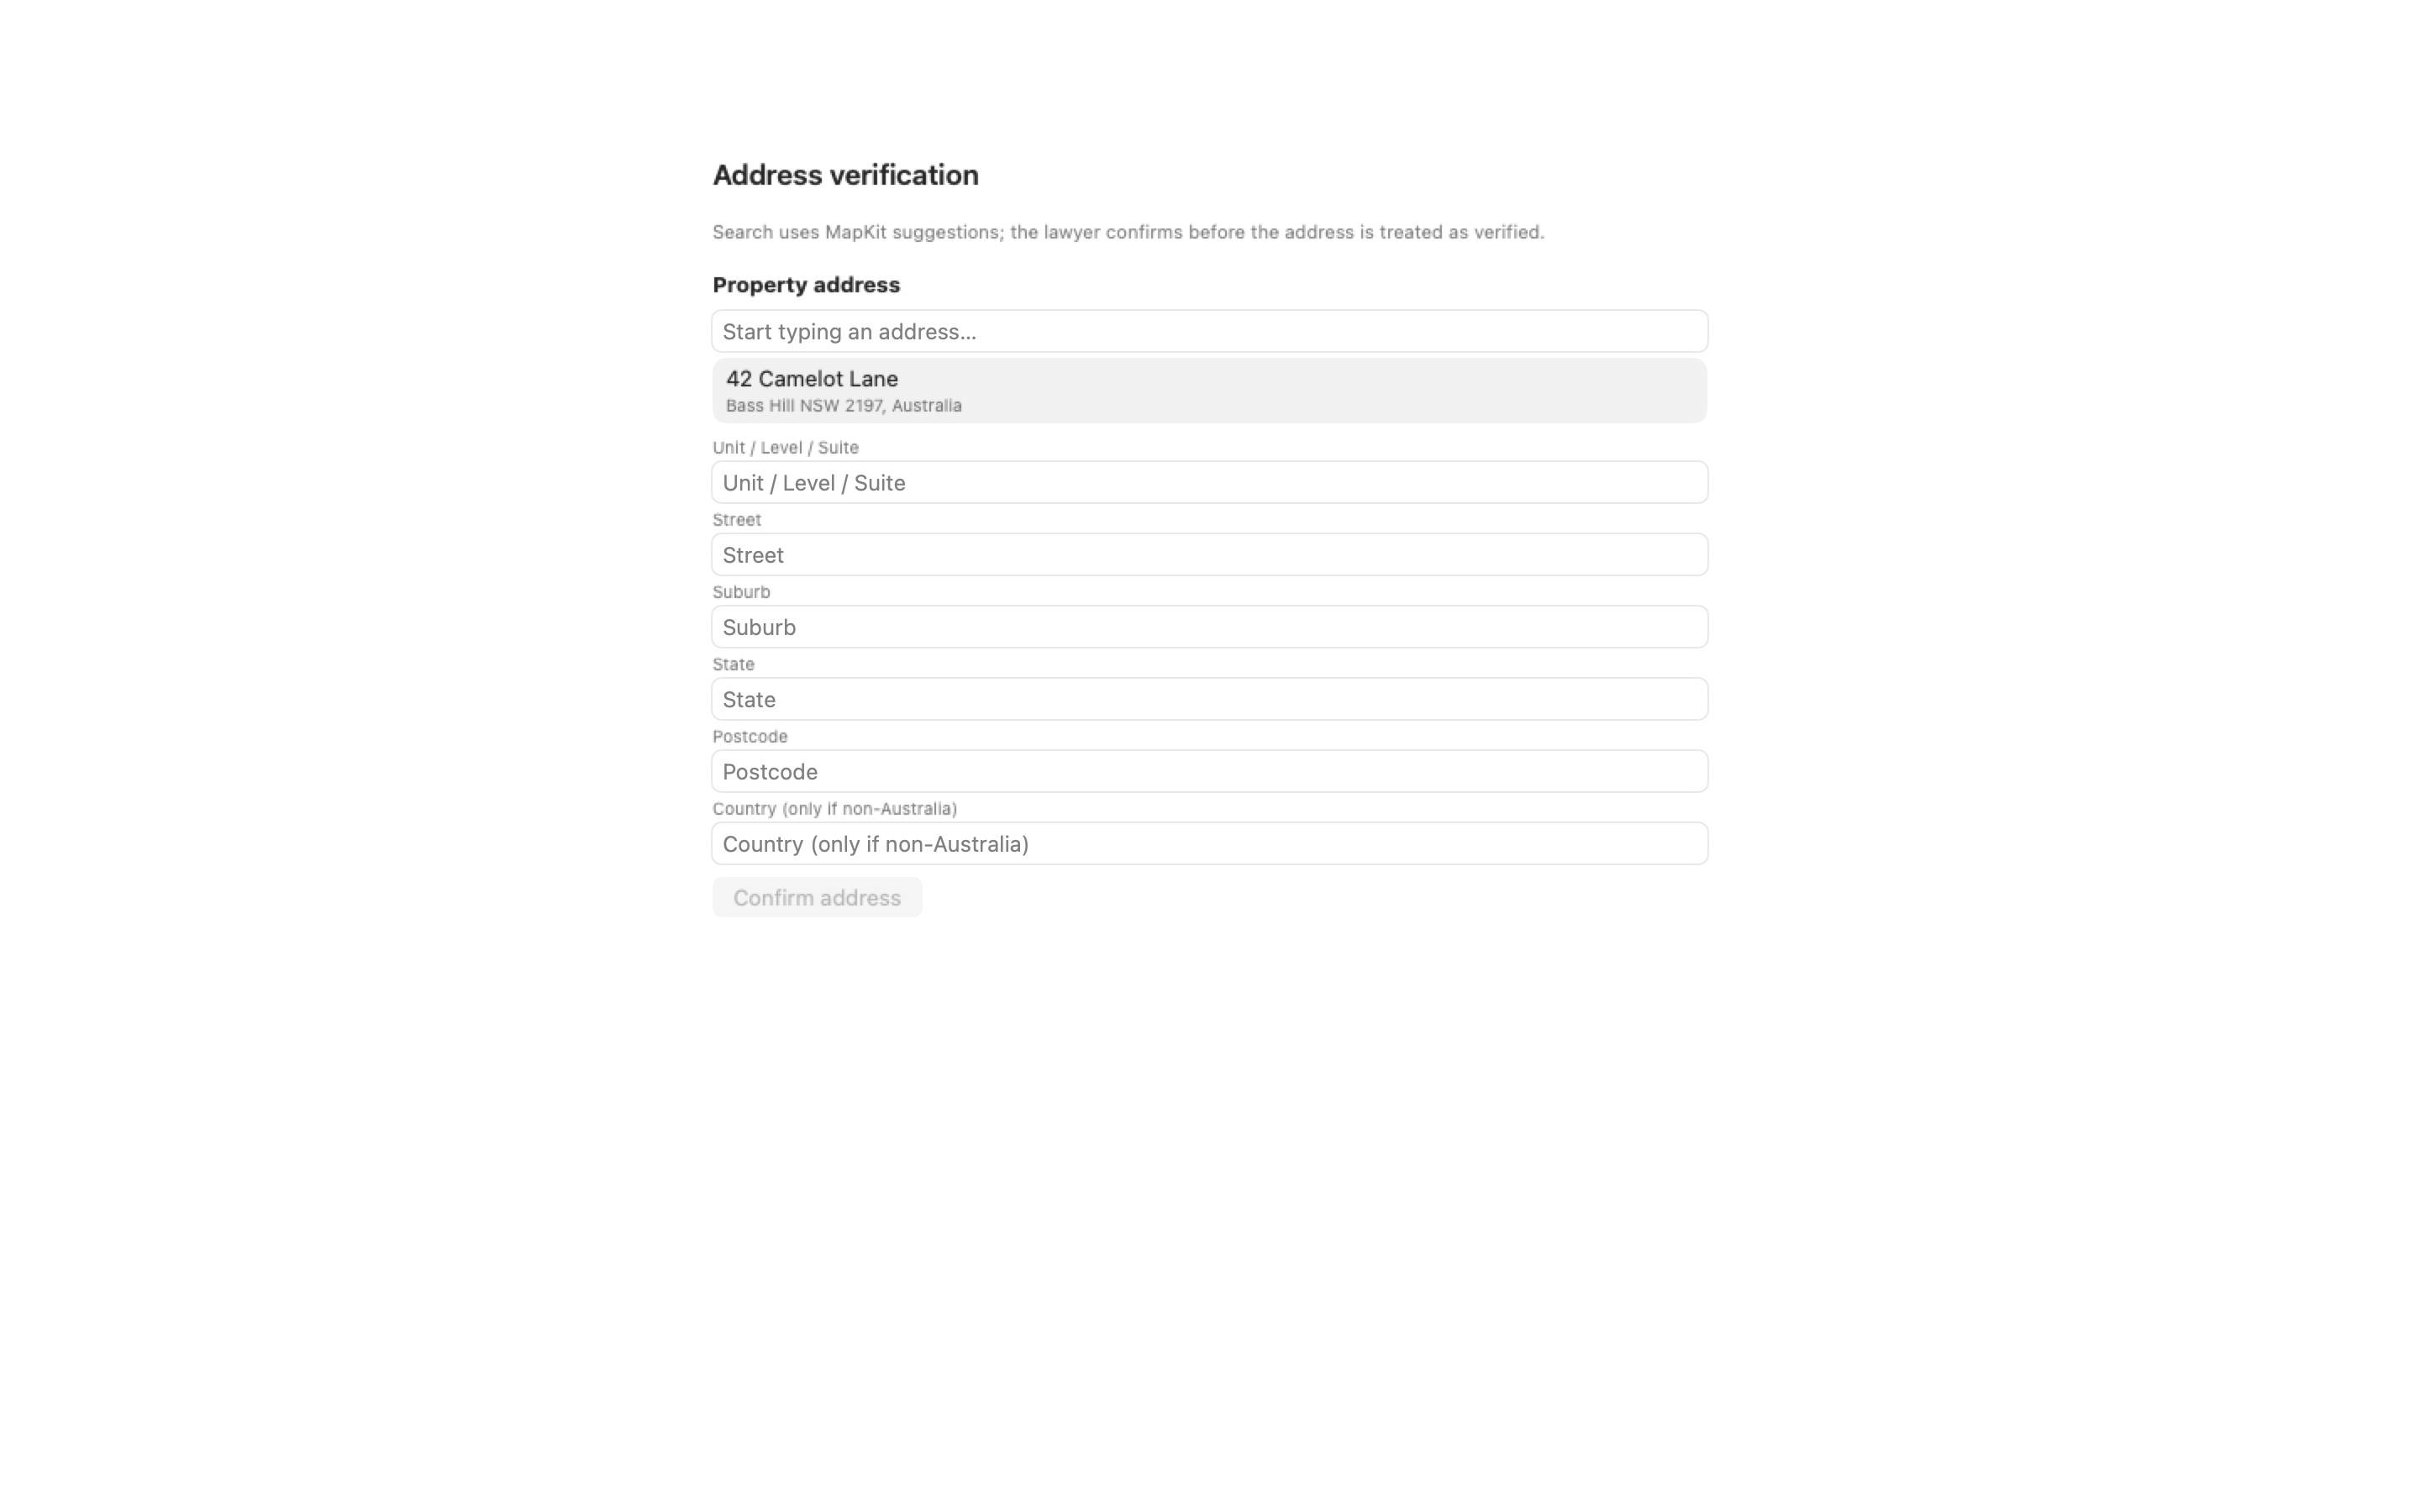
- Type into the street field — MapKit suggestions appear underneath
- Pick a suggestion — the unit, suburb, state and postcode fields populate from the structured parts MapKit returns
- Click Confirm — Certum Draft stamps the address as verified, records the source (
MapKitif you picked a suggestion and didn’t edit the structured parts afterwards, otherwiseManual), the date, and a fingerprint of the canonical form
Once verified, the card shows a “Verified · MapKit · 28 May 2026” badge under the address. Editing any structured field after verification clears the verified marker — re-confirm to re-verify.
Shared Note
Section titled “Shared Note”If Notion integration is configured, you’ll see the Shared Note from your Notion matter page. This note is visible to all team members and syncs both ways — edit it here or in Notion. If someone edits the note in Notion while you have it open, Certum Draft tells you there’s a conflict and lets you choose which version to keep rather than silently overwriting.
@mentions in the Shared Note are highlighted in accent colour. Typing @Rodney in the editor creates a proper Notion mention (with notifications) when saved.
Details
Section titled “Details”The full form for editing all matter fields:
- Workflow Stage Tabs — Switch between stages (Intake, Contract, Settlement, etc.). Press ⌘ + ⌥ + ← / → to move between stages from the keyboard.
- Form Sections — Organised by category (Client, Property, Matter, etc.)
- Conditional Fields — Blocks and fields hide or show based on gating booleans (e.g., “Is Strata?” controls whether strata-related fields appear)
- Computed Fields — Some fields auto-calculate from other values (e.g., the addressee block from the client’s title + name). If you type over a computed field manually, Certum Draft remembers the override and won’t recompute on top of your edit — re-clearing the field lets the formula resume.
- Quick Entry — When the template defines quick-entry fields, a Quick Entry toggle above the form narrows the form to just the essentials. Press ⇧ + ⌘ + E to toggle it; a “N of M fields” cue shows how much of the form you’re seeing, and the setting is remembered per matter type.
- Read-Only Mode — When another Mac holds the matter lock, you can view all details but editing is disabled. A banner shows who has the lock (see Read-only mode and Take Over below).
Auto-Save
Changes save automatically after 2.5 seconds of inactivity. Look for the “Saved” indicator in the footer. You can also press ⌘ + S to save immediately. Closing the workspace always waits for any pending save to finish first — if it can’t complete, you’re asked to choose Keep Editing or Discard Changes and Close, so nothing is dropped silently.
Documents
Section titled “Documents”Browse and manage generated documents:
- Search — Filter documents by name (⌘ + F)
- Sort — By name, date, or type
- QuickLook Preview — Click the eye icon to preview without opening
- Batch Selection — Toggle selection mode to operate on multiple documents
- Regenerate… — Right-click a rendered document to regenerate it; the wizard opens with the template that produced it already selected
Documents live in subfolders of Working Documents that mirror the template folders — the list shows the subfolder so nothing appears to be missing.
Invoices
Section titled “Invoices”Every matter has an Invoices tab for producing a bill:
- Choose a lump-sum narrative or an itemised solicitor-client bill — the fee wording and standard disbursements are seeded automatically from the matter type
- Add, edit and remove fee and disbursement lines freely; each bill type keeps its own lines when you switch
- Pick whether payment goes to the firm’s trust or office account — the generated bill names the account you chose
- Government and court fees (probate filing fees, certificates) are treated as GST-free; professional fees carry 10% GST
- Click Generate to produce an editable Excel bill in
Working Documents/Invoices/with live formulas — adjust an amount in Excel and the GST, subtotals and total recalculate. The statutory Notification of Client’s Rights notice and the firm’s header are included automatically.
Your draft is saved as you type and survives closing the matter — reopen the tab and everything is as you left it. Invoice numbers seed themselves one past the last bill for the matter; if the file already exists, you’re asked to Replace it or Keep Both (which issues the bill under the next free number).
A Generated bills list at the bottom of the tab records each bill you’ve generated (newest first), with a button to reveal the file in Finder.
Estate (deceased estates)
Section titled “Estate (deceased estates)”Estate matters gain an Estate section — the distribution picture for the estate:
- Net estate — built automatically from the values at death recorded on the Institutions tab, plus the real property value from the Details tab
- Administration costs and specific legacies — deducted to show the residue
- Per-beneficiary entitlements — computed live from each beneficiary’s percentage share, with a warning if the shares don’t total 100%
- An executor’s-year interest hint (s 84A) reminds you when interest starts accruing on unpaid legacies
Everything you see here flows into the distribution letters — the letter renders exactly the figures on this screen.
Critical Dates
Section titled “Critical Dates”Press ⌥ + ⌘ + I (or the calendar button in the toolbar) to open the Critical Dates inspector — the matter’s deadline calendar in a side panel:
- Anchor dates (exchange, settlement, date of death…) can be typed or picked right in the panel
- Derived dates are calculated from the anchors — hover one to see “Calculated from …” so you know where it came from. You can override a derived date by hand when the calculation doesn’t fit the file.
- Tick a date off with the circle beside it once it’s done — it turns green and strikes through. Tick again to restore it. Ticked-off dates stop nagging you on the dashboard.
- Export to Calendar saves the dates as an
.icsfile you can import into Outlook or Apple Calendar
If notifications are off on your Mac, the panel says so and links to System Settings — reminders can’t fire without them.
Reading documents into a matter (document intake)
Section titled “Reading documents into a matter (document intake)”On estate matters you can drop documents straight onto the matter window — death certificates, wills, driver licences, passports, bank, super, share and insurance statements, and title searches, as PDFs or photos. You can also choose More ▸ Read Document… in the toolbar.
Certum Draft reads the document entirely on your Mac (nothing leaves the machine) and opens a review sheet: proposed values on one side, the document on the other. Nothing is saved until you confirm:
- Every proposed value is editable; anything that would overwrite existing data is flagged and left unticked
- Statements also propose an institution record for the Institutions tab (or a new account on an existing one)
- Choose where the document is filed — Important Documents or Correspondence
- Skip moves to the next document in the queue; Stop Reviewing ends the run and leaves the rest untouched
Applying values is undoable — the confirmation message offers Undo, which restores exactly what was overwritten.
Workflow Timeline
Section titled “Workflow Timeline”The timeline at the top of the Overview shows your progress through the matter’s workflow stages:
- Completed stages show a green checkmark
- Current stage shows as a highlighted dot
- Future stages show as grey circles
Click a stage to jump to its form section in the Details tab. Clicking a stage dot to move the matter’s stage asks for confirmation first, so looking doesn’t change anything.
Toolbar Actions
Section titled “Toolbar Actions”The toolbar provides quick access to common actions:
| Action | Shortcut | Description |
|---|---|---|
| Email Client | ⌘ + E | Compose email with pre-filled subject |
| Copy Email Subject | — | Copy the subject line to the clipboard |
| Open Folder | — | Open matter folder in Finder |
| New Document | — | Launch document generation wizard |
| Copy Matter # | — | Copy matter number to clipboard |
| Print Summary | — | Print A4 matter summary |
| Stamp Duty Calculator | — | Open the NSW stamp duty calculator |
| Export ZIP | — | Package matter as ZIP archive |
| Open in Notion | — | Open the linked Notion page |
Read-only mode and Take Over
Section titled “Read-only mode and Take Over”Only one Mac edits a matter at a time. If a colleague (or your other Mac) has the matter open, you can still read everything, but editing is disabled and a banner says “Read-only — NAME is editing this matter”, with when they were last seen.
If you’re sure they’ve walked away, click Take Over. Certum Draft asks you to confirm first — taking over while they’re still working could lose their unsaved changes. The moment you take over, their copy flips to read-only with a banner naming you; if they had unsaved edits, they’re told immediately (“Your latest edits can’t be saved — NAME took over this matter”) and asked whether to discard them or keep viewing.
The lock also releases itself after about five minutes of genuine inactivity — but scrolling, typing and switching sections all count as activity, so reading a matter during a phone call won’t hand your lock away. When you start editing again, the lock is re-acquired automatically.
Batch Document Operations
Section titled “Batch Document Operations”To work with multiple documents at once:
- Click the selection toggle button in the Documents toolbar
- Check the documents you want to work with
- Use the batch action buttons:
- Open All — Open selected documents in their default apps
- Email All — Attach selected documents to an email
- Show in Finder — Reveal selected documents
QuickLook Preview
Section titled “QuickLook Preview”Preview documents without opening them:
- In the Documents section, find the document you want to preview
- Click the eye icon on the document row
- A preview sheet appears with the document content
- Close the preview to continue working
Institutions (Estates)
Section titled “Institutions (Estates)”For estate matters, the sidebar shows an Institutions section after the first workflow stage. This is where you track banks, super funds, aged care providers, and other asset holders — including each holding’s value at death, which feeds the Estate distribution figures.
Adding Institutions
Section titled “Adding Institutions”Click the + button in the institutions toolbar to open the institution picker:
- Search by name, ABN, or address
- Filter by type (Bank, Super Fund, Aged Care, etc.)
- Institution logos load automatically
- Click to add, then enter account/member/policy numbers
Institution Lifecycle
Section titled “Institution Lifecycle”Each institution progresses through phases:
- To Notify — generate a Notice of Death letter
- Awaiting Response — notice sent, waiting for the institution to respond
- Awaiting Grant — institution requires Grant of Probate (not yet issued)
- Ready for Grant — grant has been issued, generate Grant Letter
- Awaiting Funds — grant letter sent, waiting for assets to be released
- Complete — funds received
The current phase and next action are shown for each institution. When the Grant of Probate is recorded on the matter, a banner appears offering to batch-generate all grant letters at once.
Recording a Response
Section titled “Recording a Response”Click “Record Response” to capture:
- Response date
- Whether Grant of Probate is required (Yes / No / Unsure)
- Requirements notes (what the institution needs to release assets)
AML/CTF Compliance
Section titled “AML/CTF Compliance”Purchase, Sale, and Estates matters include a Compliance tab (second workflow stage) with blocks for:
- Identity Verification — ID document type, number, expiry, verification method
- PEP & Sanctions Screening — Politically Exposed Person checks, DFAT sanctions
- Risk Assessment — Client, transaction, and jurisdiction risk factors (Low/Medium/High)
- Source of Funds — Funding source, transaction value, evidence sighted
- Source of Wealth — Only visible when Enhanced Due Diligence is required (High risk)
- Compliance Status — Overall status, red flags, SMR tracking
Click the shield icon in the header toolbar for quick access to the Compliance tab. Generate a CDD Report PDF from the shield menu.
Print Summary
Section titled “Print Summary”Generate a printable summary of the matter:
- Click Print Summary in the More menu
- Review the A4-formatted summary showing:
- Matter and client details
- Property information (if applicable)
- List of generated documents
- Print or save as PDF
Export as ZIP
Section titled “Export as ZIP”Package the entire matter for sharing or archiving:
- Click Export as ZIP in the More menu
- Choose a save location
- The ZIP file is created and revealed in Finder
Keyboard Shortcuts
Section titled “Keyboard Shortcuts”| Action | Shortcut |
|---|---|
| Save | ⌘ + S |
| Undo | ⌘ + Z |
| Email Client | ⌘ + E |
| Toggle Quick Entry | ⇧ + ⌘ + E |
| Previous / next workflow stage | ⌘ + ⌥ + ← / → |
| Critical Dates inspector | ⌥ + ⌘ + I |
| Search documents | ⌘ + F |
| Refresh Documents | ⌘ + R |
| Close Matter | ⌘ + W |
| Command palette | ⌘ + K |
These are also listed in the Matter menu so you can discover them without memorising.
Troubleshooting
Section titled “Troubleshooting”Changes not saving
Section titled “Changes not saving”Auto-save requires 2.5 seconds of inactivity. If you’re typing continuously, wait a moment or press ⌘ + S. If a save itself fails (for example, Dropbox is mid-sync), a save-error banner appears with a Retry Save button — retrying never discards what you typed.
”Read-only — NAME is editing this matter”
Section titled “”Read-only — NAME is editing this matter””Another Mac has this matter open. Close it there first, or click Take Over (with confirmation) to claim the editing lock — see Read-only mode and Take Over.
Documents not appearing
Section titled “Documents not appearing”Click the refresh button in the Documents toolbar (or press ⌘ + R). If documents still don’t appear, check that they exist in the matter folder. A permissions or sync problem shows an explicit error with a Try Again button rather than an empty list.
Shared Note not loading
Section titled “Shared Note not loading”Ensure Notion integration is configured in Preferences. The note requires an active internet connection and valid Notion credentials.